User Guide
Select the menu items from the Table of Contents below to navigate through the Step-by-Step Guide.
Step-by-Step Guide
Registration
-
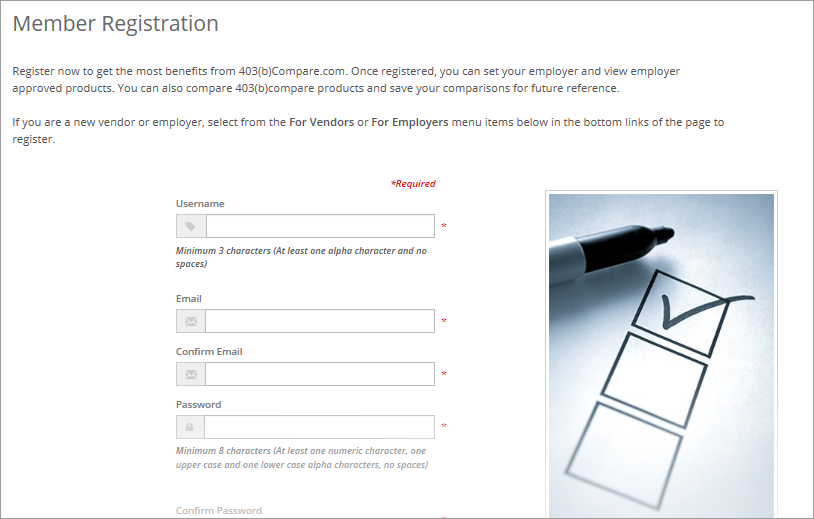
To register, select the Register button located at the top right of the menu bar.

-
Complete the required fields of the Registration form and select the Register Account button to save your account.
Sign-In
-
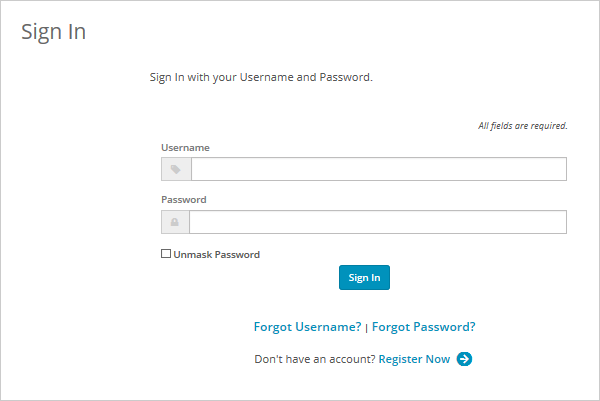
To sign in, select the Sign In button at the top right of the menu bar.

-
Enter your Username and Password and select the
Sign In
button to submit.
Member Profile
-
Select the Sign In button at the top right of the menu bar.
-
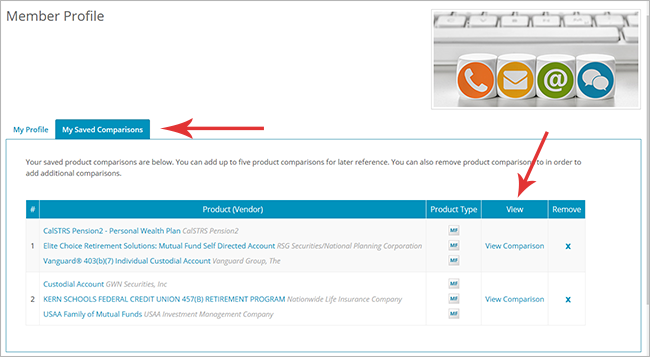
Select the Member Profile tab to view your account details. Select the Edit button to make changes and select
Save
to save your changes.

-
Select the My Saved Comparisons tab to view your previously saved comparisons. You can save up to 5 comparisons for future reference.
My Next Steps
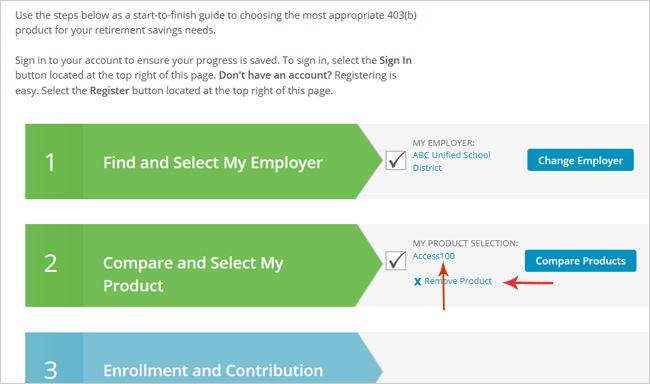
Use the My Next Steps as a start-to-finish guide to choosing the most appropriate 403(b) product for your retirement savings needs.
Make sure you register an account to save your progress. Please refer to the Registration section of this User Guide for information on how to Register. If you are already registered, make sure you sign In to your account to ensure your progress is saved. Refer to the Sign In section of the User Guide for information on how to Sign In.
Select
My Next Steps
link from the menu bar at the top of the page.

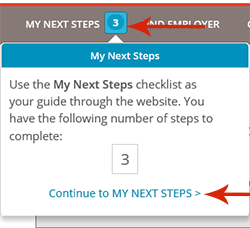
My Next Steps can also be accessed by selecting the numbered badge to the right of the My Next Steps link to open the badge instruction drop down box. To open the badge instruction drop down box, select the link to continue to
MY NEXT STEPS
.
Step 1: Find and Select My Employer
-
To find your employer, select the Find Employer button under
Step 1: Find and Select My Employer.
This will enable you to locate products through your employer's approved vendor list.

-
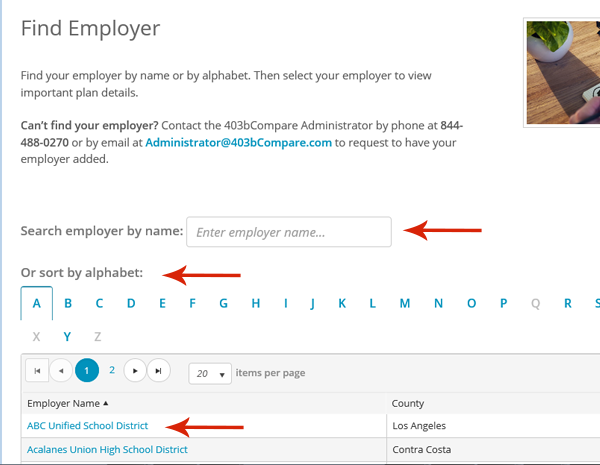
Search for your employer by entering your employer’s name into the search box or by selecting the first letter of your employer’s name using the alphabet tabs.
Next, select your employer name from the list under the Employer Name column below.
-
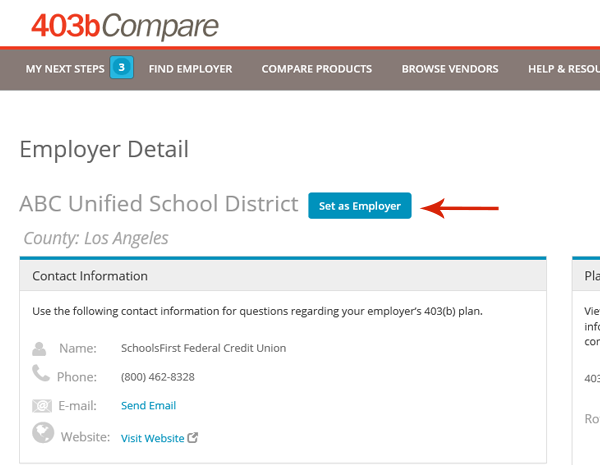
Once the
Employer Detail's
page is displayed, select the Set as Employer button to set the displayed employer as your employer.
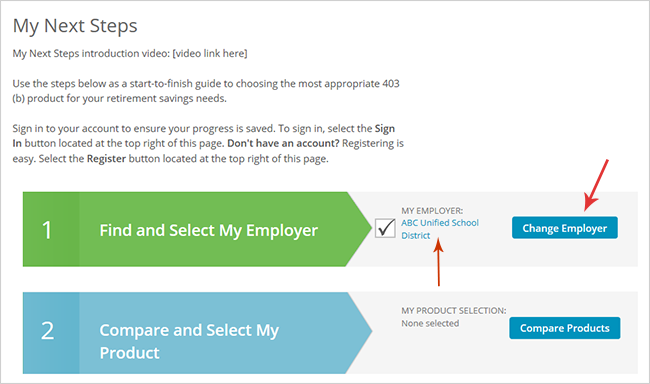
After selecting the Set as Employer button, your employer will be displayed under Step 1: Find and Select My Employer.
Use the Change Employer button to remove and set a new employer .
Step 2: Compare and Select My Product
-
Set your product by selecting the Compare Products button under
Step 2: Compare and Select My Product
to view your employer approved products.

-
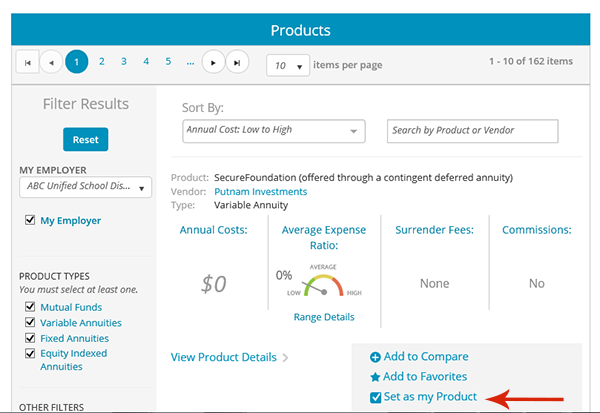
View and compare products from the Compare Products page. Once you have found a product you are interested in, select the
Set as My Product
button.
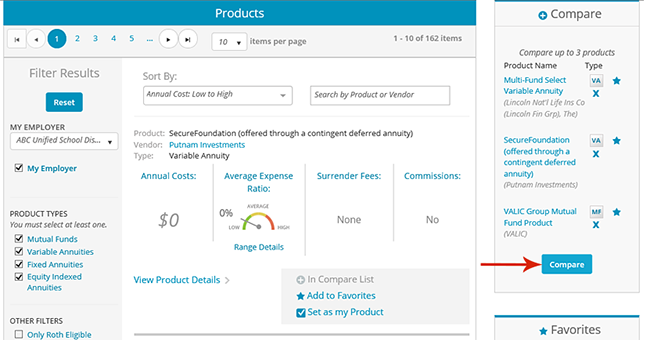
Alternatively, you can also set your product from the side-by-side Product Comparison page. This page is generated once you have added products to the Compare box by selecting the Add to My Compare button displayed under each product and selecting the Compare button within the Compare box.
Once you have set your product, the product will display under Step 2: Compare and Select My Product.
Use the Remove Product button to remove the selected product. This will allow you to go back to the Compare Products page to select a new product.
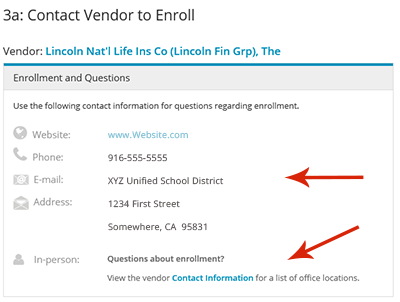
Step 3: Enrollment and Contribution Information
-
Contact the vendor to enroll using the contact information displayed under
Step 3a: Contact Vendor to Enroll
. Some vendors will allow you to enroll via a website, phone number, or in-person.
If a vendor only allows you to enroll in-person, select the
Contact Information
link to view the vendor’s California office locations.

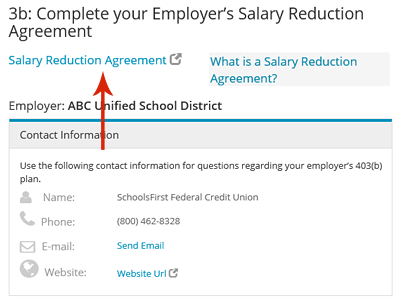
-
Use the Salary Reduction Agreement link provided by your employer to initiate or change your contributions. The link will either take you
to a printable form or a website. If you have any questions regarding this step, your employer’s contact information is provided for your reference.
Find Employer
Finding and setting your employer is important. This is the first step in comparing investment products and it ensures you view only the vendors approved by your employer.
-
To find your employer, select the Find Employer in the top menu bar.

Alternatively, you can find your employer by navigating to the My Next Steps page and selecting the Find Employer button under Step 1: Find and Select My Employer.
-
Search for your employer by entering a name into the search box or selecting the first letter of your employer's name using the alphabet tabs.
Next, select the employer name in the results below.
-
Once the Employer Detail's page is displayed and you have confirmed this is your employer, select the
Set as Employer
button.
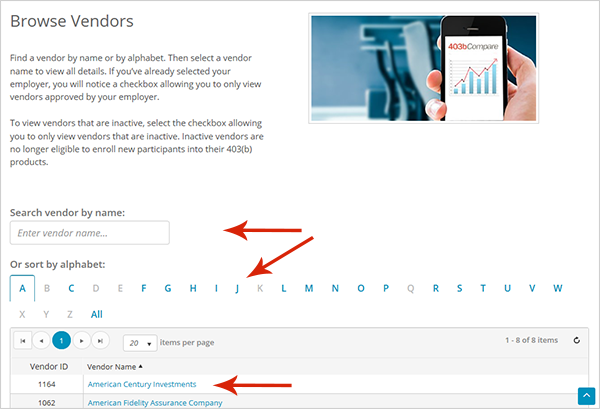
Browse Vendors
-
To browse vendors, select the Browse Vendors link in the top menu bar.

-
You can search for vendors by entering a name into the search box or by selecting the first letter of the vendor’s name using the alphabet tabs.
Next, select the vendor name from the
Vendor Name
column below to view vendor details.
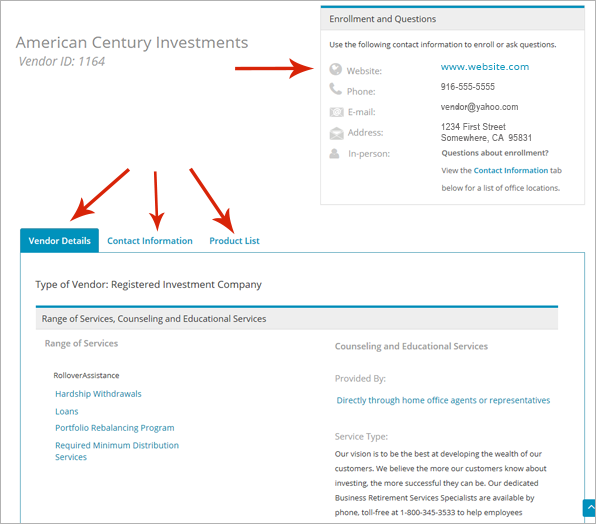
Vendor Details
-
Vendor Details
can be accessed by selecting the name of a vendor from the vendor search results as described in the Browse Vendor section above.
Once the Vendor Details page is displayed, select the Vendor Details tab to view information about the services that are offered for that particular vendor.
-
The
Enrollment and Questions
box located at the top right of the page provides ways to contact the vendor if you are interested in enrolling. Additionally, the
Contact Information
tab can be selected to view vendor
California office locations and more. Selecting the
Product List
tab will enable you to see a list of the vendor’s 403(b) products.
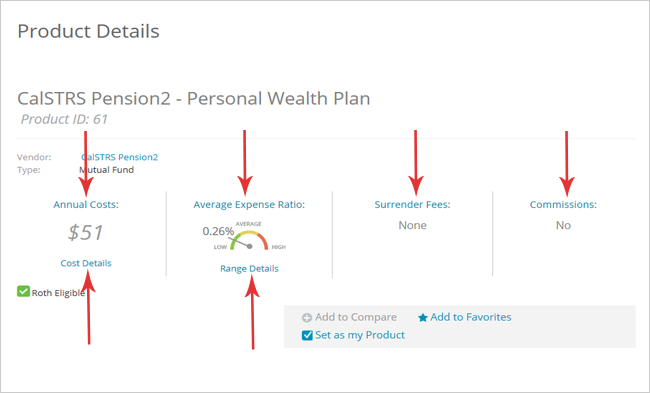
Product Details
-
Access
Product Details
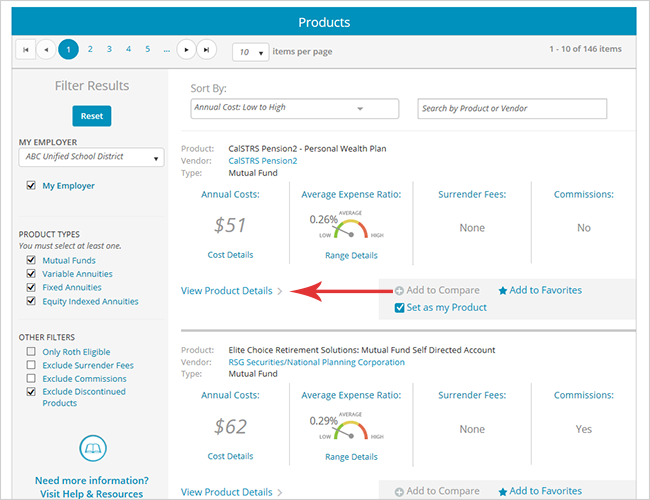
by selecting the Compare Products link from the top menu.

-
Select the View Product Details link that can be found under each product listing.
-
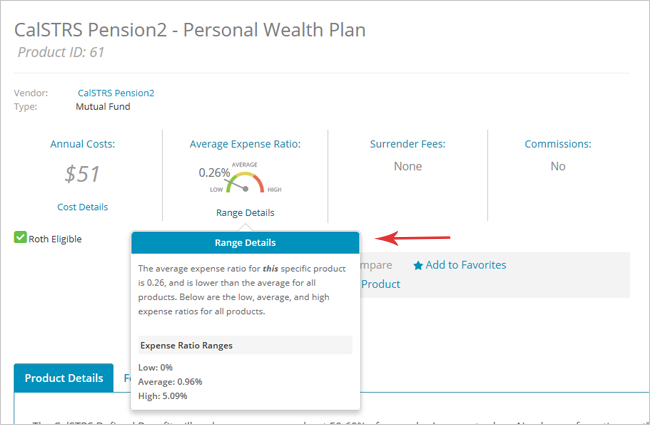
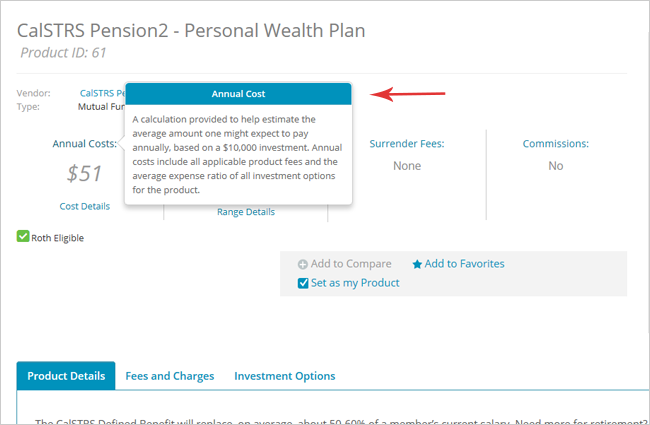
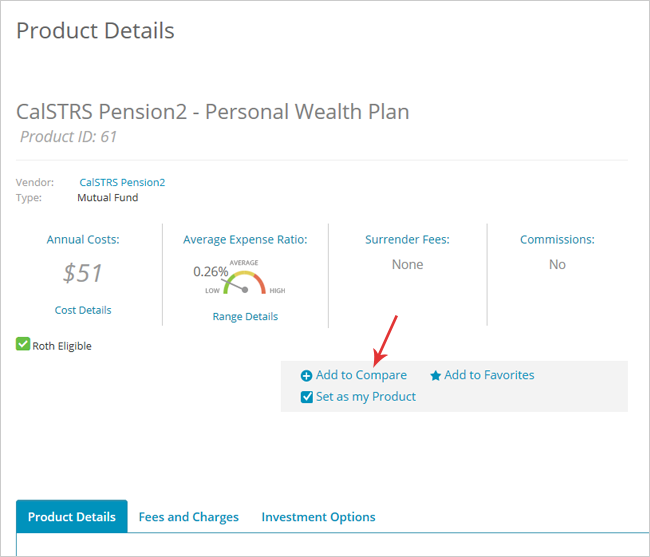
On the
Product Details
page, select the links under the product summary to reveal details regarding Annual Costs,
Average Expense Ratio
,
Range Details
, Surrender Fees and Commissions.
-
Details regarding
Product Details
, Fees & Charges and
Investment Options
can be found further down the page under tabs. Selecting the linked options within these tabs will expand to display additional information.
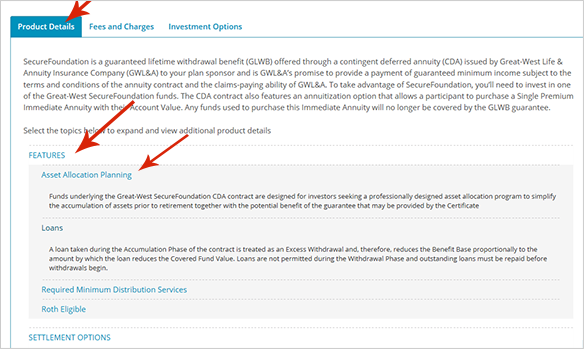
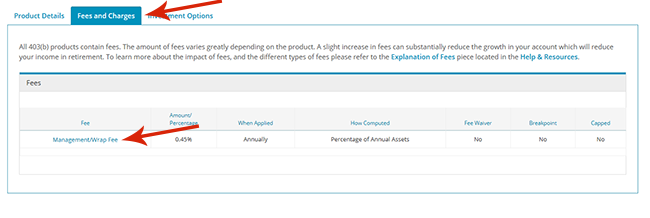
Selecting the Fees and Charges tab will reveal details regarding product costs.

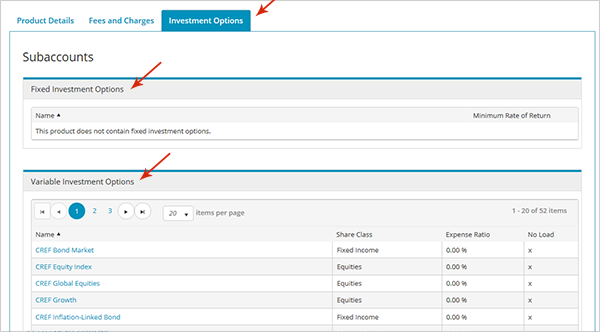
Selecting the Investment Option tab will display a list of available fixed and variable investment options associated with that product.
Investment Option Details
-
Access Product Details by selecting the Compare Products link from the top menu.
-
Select the View Product Details link that can be found under each product listing.
-
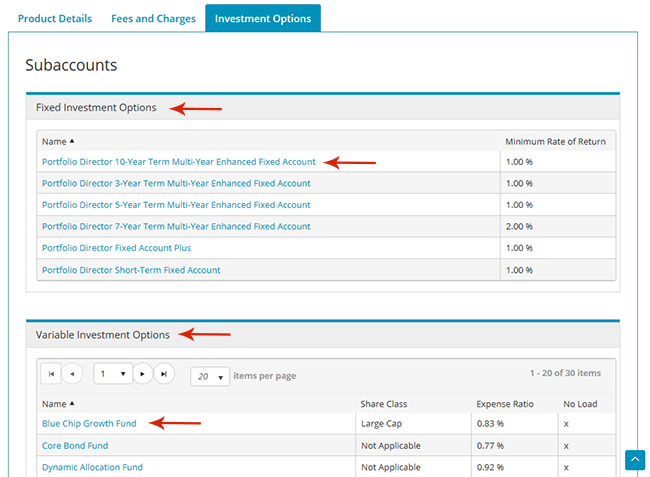
Select the
Investment Options
tab. This tab will display a list of available fixed and variable investment options associated with the product. Selecting the name of a
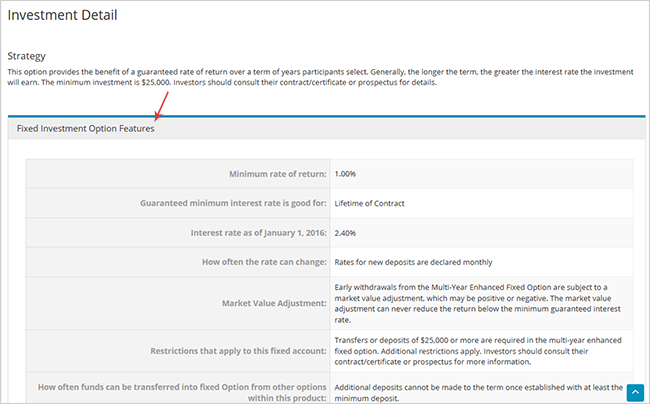
fixed or variable investment option will display a details page for that specific investment option. The details page for a fixed investment option differs
from a variable investment option.
-
Selecting the name of a fixed investment option will display the Fixed Option Details page.
-
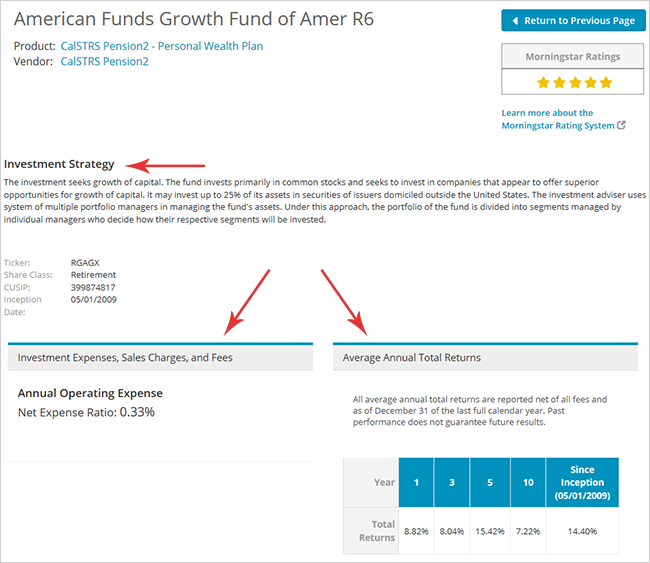
The
Variable Investment Option Details
page will display the information regarding
Morningstar Ratings
, Investment Strategy,
Sales, Charges and Fees
, Average Annual Total Returns and
Impact of Expenses and Fees
.

Compare Products
-
Compare products by first selecting the Compare Product link from the top menu.
-
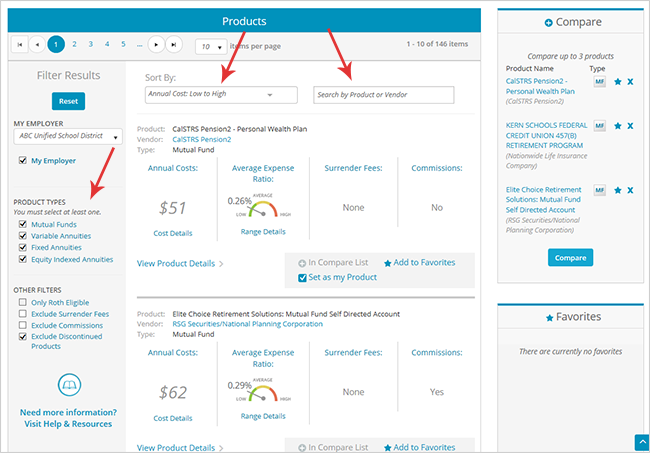
The product list can be filtered by selecting or deselecting options from the
Filter Results
panel. In addition, products can be sorted by the sort options at the top of the products list or by searching by product
or vendor.
-
When you have found a product that you would like to compare, select the
Add to Compare
link that can be found under each product listing.
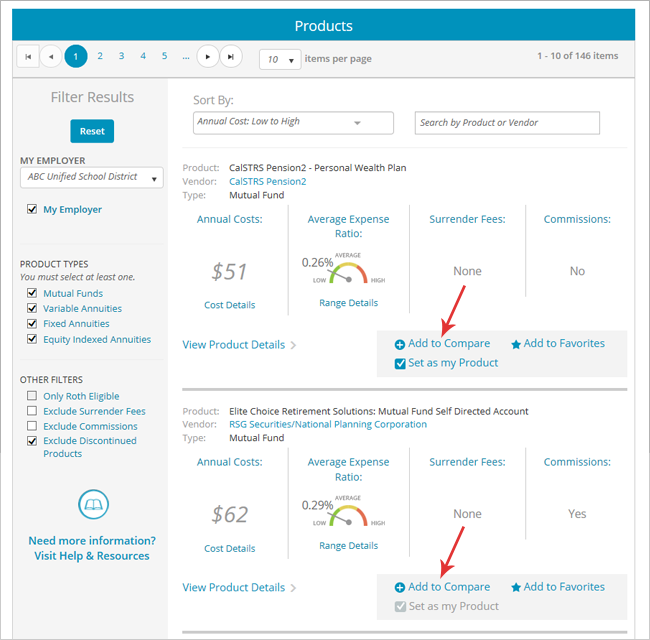
Alternatively, you can select the Add to Compare link from the Product Details page.
-
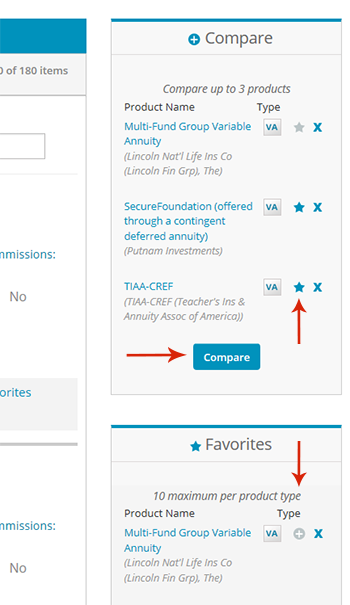
After selecting the
Add to Compare
link, your products will appear in the Compare box. Select the
Compare
button to view a side-by-side comparison of up to three products.
Items from your
Compare
box
can be added to your
Favorites
by selecting the star icon. If you have signed into your account, items saved to the
Favorites
box will be saved for later viewing or comparing on return visits.
-
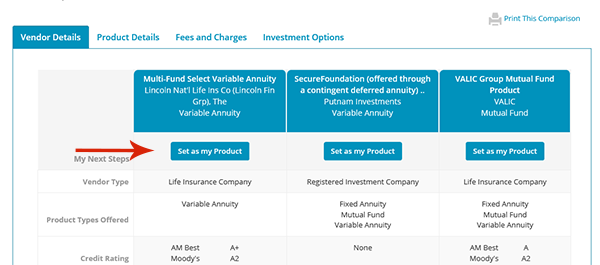
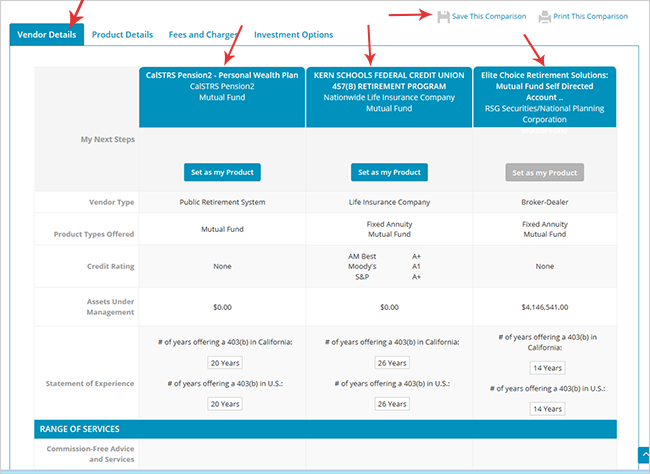
Once the
Compare
button is selected, tabs for Vendor Details,
Product Details
, Fees and Charges and
Investment Options
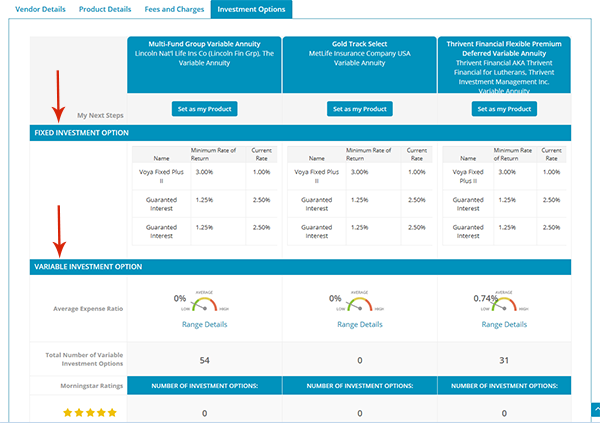
will display details for each corresponding section side-by-side.
Select the
Print This Comparison
link to print your side-by-side comparison. If you are signed in, you can select
Save My Comparison
to save your side-by-side comparison.
Comparison Results
-
To get to this page, follow the directions in the
Compare Product section above to find products and then select the
Compare
button.
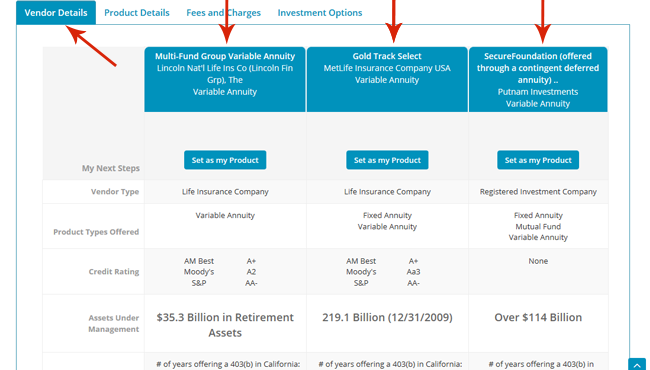
Once the Compare button is selected, the first tab will display the Vendor Details tab. Vendor Details includes details regarding vendor products, assets, credit rating, and the services offered.
-
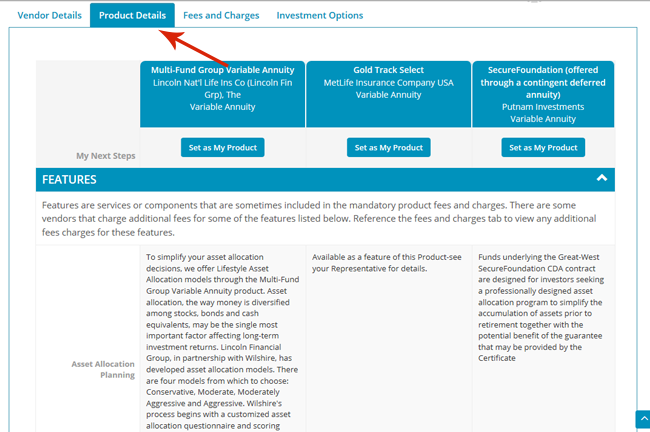
The
Product Details
tab displays details about the product features.
-
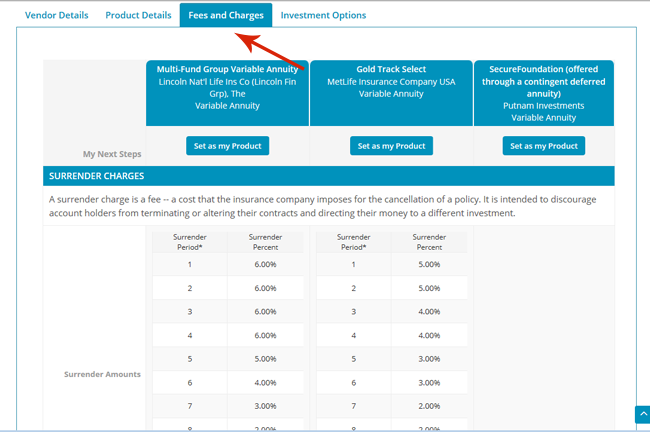
The
Fees and Charges
tab displays costs associated with the product.
The Investment Options tab displays Fixed Funding Options and Variable Funding Options associated with the investment product. Within these Investment Options sections, additional information can be found associated with Fixed Investment Options or Variable Investment Options.